Epic Tyrants Rating Update (Good)

Epic Box

I have just updated my ratings for Epic cards to include the Tyrants Good cards. In addition, I have actually tweaked a few of the base Good cards’ ratings as well. (The original ratings and explanations are still there, I just added a section for Tyrants updates.) The updated post can be found here. I will be updating Evil soon. In general, the Tyrants cards seem very strong.

Sushi Go! Review

Sushi Go Box

Foreword

Sushi Go! is one of the simplest drafting games.

Drafting

There are 2 major forms of drafting: simultaneous hidden drafting and sequential open drafting. Sushi Go! uses simultaneous hidden drafting.

Simultaneous Hidden Drafting

In this form of drafting, every player starts with an equal number of hidden resources, usually cards. Each player simultaneously picks a resource (keeping it hidden) and then passes the remaining resources to the player on their left (sometimes right). This then continues until there are no resources remaining to pass.

For example, in a 4 player Sushi Go! game each player starts with 8 cards. Everyone picks a card and passes the remaining 7 to the player on their left. Then everyone picks a card from the 7 passed to them, followed by the remaining 6 cards being passed, etc.

Simultaneous hidden drafting is also used in Epic’s cube draft and dark draft formats, Magic: The Gathering’s 8 player draft, Medieval Academy, Seasons, and 7 Wonders.

Sequential Open Drafting (Not used in Sushi Go!)

How to Play

Sushi Go In Progress

Goal

The goal of the game is to score the most points over 3 rounds of drafting.

The Round

Sushi Go! uses Simultaneous Hidden Drafting, described above, for each round.

For a 2 player game, 10 cards are dealt to each player.
For a 3 player game, 9 cards are dealt to each player.
For a 4 player game, 8 cards are dealt to each player.
For a 5 player game, 7 cards are dealt to each player.

Since this is Simultaneous Hidden Drafting, each player simultaneously picks a card from their hand, and then all players reveal their chosen card at the same time. Afterwards, the remaining cards from each players’ hand are passed to the player on their left. The round completes after the last card of hand is picked.

After the 3rd round, the player with the most points wins.

The Cards

Nigiri (Egg, Salmon, and Squid)

Sushi Go Nigiri

Nigri is worth a set number of points at the end of the round. Egg Nigiri is worth 1. Salmon Nigiri is worth 2. Squid Nigiri is worth 3.

Wasabi

Sushi Go Wasabi

Wasabi triples the value of the next Nigiri card you draft. So, say you draft a Wasabi card on turn 1. Then, on turn 3 you draft your first Nigiri card, a Squid Nigiri. That Squid Nigiri goes on top of your Wasabi and those cards together are worth 9 points total. You may not use multiple Wasabi cards on a single Nigiri card, and you may not use a single Wasabi card with multiple Nigiri cards.

Tempura and Sashimi

Sushi Go Sets

Both Tempura and Sashimi require a set of cards to be worth any points. A set of 2 Tempura is worth 5 points. A set of 3 Sashimi is worth 10 points. If you do not have a full set, you score no points from those cards. If you have 2 complete sets, you score full points for both. So, say you have 5 Tempura and 2 Sashimi. You have 2 complete sets of Tempura so you score 10 points from Tempura. You do not have a complete set of Sashimi so you score 0 points from Sashimi.

Dumplings

Sushi Go Dumpling

The more Dumplings you have, the more points you score per Dumpling. If you have 1 Dumpling, your Dumplings are worth 1 point (1 point per Dumpling). If you have 5 or more Dumplings, you Dumplings are worth 15 points (3 points per Dumpling).

Maki Rolls

Sushi Go Maki

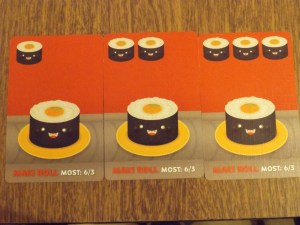
Maki Roll cards have 1, 2, or 3 Maki Rolls on them. They are depicted at the top of the card. At the end of the round, the player with the most Maki Rolls scores 6 points. The player with the second most scores 3 points.

If players tie for the most Maki Rolls, the points are split between those tied players. In that situation, no second place points are awarded. If players tie for the 2nd most Maki Rolls, the points are split between those tied players. In both cases, ignore any leftover points after evenly splitting the points.

Puddings

Sushi Go Pudding

Puddings are the only cards that carry over after each round (the rest are discarded). At the end of the 3rd round, the player with the most puddings scores 6 points. The player with the least puddings loses 6 points. Points are evenly split for ties.

Chopsticks

Sushi Go Chopsticks

Chopsticks let you take 2 cards instead of 1 when drafting. If you have a drafted Chopsticks card in front of you, after everyone (including you) has picked their card, you say “Sushi Go!,” and you replace your chopsticks card with another card from that hand.

Conclusion

I’ve said it many times, and I’ll say it again: I love drafting. Sushi Go! is an excellent game for introducing people to drafting. The art is adorable which can attract people, it’s quick, and the drafting strategy isn’t too complex.

In general, the idea of drafting can be bit tricky to get your head around initially. This is because most of the interesting aspects of it are emergent and not directly explained in the rules. When drafting, you want to look at not only what will be the best card for you right now, but based on the other cards in the current and previous hands, what are you likely to get back later in the game. (Since, in a 4 or less player game, you will see each starting hand at least twice).

In addition, once people start taking cards, you can deduce whether you can finish Tempura or Sashimi sets, or if you need to prevent another player from getting all the Dumplings, etc. So, in other words, a large portion of a drafting game’s potential relies on reading your opponents and paying attention to what is happening around you. Although, with this game you can still have fun just working toward your own goals and enjoying the art/theme.

The game I largely want to compare this to is Medieval Academy. (Click here for my review of Medieval Academy.) I think Sushi Go! is a bit simpler, it gives a better feel for drafting with the larger starting hand sizes, and the theme can be a bit more accessible. However, I prefer Medieval Academy. I prefer playing it, and it is the game I use when introducing new players to drafting. Medieval Academy adds on a spatial racing type game-mechanism, and I feel like it can be a bit more engaging. Sushi Go! is strictly drafting. A strictly drafting game is good for teaching the mechanism, but I just don’t feel like there is enough to keep me interested. On the positive side, Sushi Go! is quicker and requires less setup than Medieval Academy.

Overall, if you are looking for a game to teach new players drafting, I would personally recommend Medieval Academy over Sushi Go!. If, however, you want a smaller, quick to play, strictly drafting game, Sushi Go! does work for that purpose. Sushi Go! is a nice game to start or wrap up a gaming session. It’s easy to break out and play since you can carry it in your pocket and you just need a little table space. But, it isn’t a game I would specifically get people together to play.

Epic Tyrants Rating Update (Sage)

Epic Box

I have just updated my ratings for Epic cards to include the Tyrants Sage cards. In addition, I have actually tweaked a significant number of the base Sage cards’ ratings as well. (The original ratings and explanations are still there, I just added a section for Tyrants updates.) The updated post can be found here. I will be updating the rest of the factions in the coming weeks. In general, the Tyrants cards seem very strong.

Carcassonne Review

Carcassonne Box

Foreword

Carcassonne is a popular game that spawned the term “meeple” used to describe wooden, humanoid game-pieces. It is also a prime example of a tile-laying game.

CarcasonneInProgress

How To Play

Setup

Each player takes their 8 meeples. One is placed on the scoring track and the rest will be used throughout the game.

Place the starting tile in the middle of the table. The starting tile has a distinct back, and on its front, it has a castle, road, and field segment.

Carcassonne Start Tile

Mix up the rest of the tiles face down and put them into easily reachable stacks.

A Turn

On your turn you draw a tile, place the tile, and optionally place one of your meeples on that tile.

When placing a tile, you must put it orthogonally (not diagonally) adjacent to 1 or more placed tiles. Every side touching another tile must match like segments to like segments: road segments to road segments, castle segments to castle segments, and field segment to field segments.

Carcassonne Correct Tile Placement

Once you have placed the tile, you may place one of your meeples onto that specific tile. You can either place it on a city, cloister, field, or road, but you can not place it directly onto a segment that already has a meeple. For example, since the red player already has a meeple on the road, the blue player cannot extend that road and put one of their meeples on it.

Carcassonne Invalid Road

However, you can place meeples in such a way that they will eventually be on the same segment. In the case above, if the blue player places the tile one to the right as its own road, they could place a meeple on it. Then, if the blue player later draws a tile that would connect the two roads, it is legal to connect them creating a situation where both players have a meeple on the same road.

Carcassonne Steal Road

If multiple players have an equal number of meeples in a segment, all of those players score full points. If one player has more than anyone else in that segment, only that player scores points.

Trying to sideways take over other people’s segments is the most interesting part of this game.

Scoring

After a tile has been placed and the player has a chance to put a meeple on it, if the placement completes a segment, that segment scores. The player(s) with the most meeples on that segment score points based on the system below, and all players on that segment get those meeples back to reuse. Cities, cloisters, and roads can be completed throughout the course of the game. Farms only score points at the end of the game. (So, once you place a meeple on a farm, you will never get that meeple back.)

Cities: A completed city is worth 2 points per tile in the city. Each pennant in that city is worth a bonus 2 points. If a city is only two tiles, that city is only worth 1 point per tile. At the end of the game, if you have the most meeples in an uncompleted city, you score 1 point per tile and 1 point per pennant for that city.

Carcassone Cities

The first 4-tile city with 1 pennant is worth 4 x 2 + 2 x 1 = 10 points.
The second 2-tile city is worth 2 points.
The third 3-tile uncompleted city with 1 pennant is worth 3 x 1 + 1 x 1 = 4 points.

Cloisters: A cloister is worth 1 point for every tile around the cloister including itself. So, a completed cloister is worth 9 points. Uncompleted cloisters at the end of the game still reward 1 point for every tile around the cloister.

Carcassonne Cloister

Roads: A road is worth 1 point per tile in the road. At the end of the game, uncompleted roads are still worth 1 point per tile in the road.

Carcassonne Road

Farms: Farms score 4 points at the end of the game for each completed castle they touch. The size of the castle is irrelevant. Since the field segments that connect castles can sprawl all over the place, farms can score a lot of points at the end of the game.

Carcassonne Farms

Game End

The game ends when the last tile is placed. All remaining points are scored. The winner is the player with the most points.

Conclusion

The fun in Carcassonne comes from the tile drawing. Whether you are trying to complete your segments or take over another player’s, it all rides on drawing certain tiles. And, since you generally won’t draw the tile(s) you need immediately, the anticipation continues to grow throughout as you hope to draw the tiles you need and hope your opponent(s) don’t draw the ones they need. In addition, most of the time the tiles you draw will have some value, even if it isn’t the one you are desperately waiting for. You need a double sided castle, but you draw an always appreciated cloister instead. On your next turn, instead of that double sided castle, you draw a tile to help solidify your control over the mega farm. Once the game gets going, each tile draw is exciting and suspenseful.

With that in mind, Carcassonne is not one of my personal favorite games. People I play it with really enjoy it, and it is a very popular game, but it doesn’t do much for me. While it feels great when you get that tile you’ve been wanting for for the last 10 turns, it is incredibly frustrating if you never draw it. Getting your segments snatched from beneath you is also frustrating if you can’t prevent them from doing it. This aspect of the game is also the most enjoyable part when you are on the snatching side, so it is attempted a decent amount in games. (I am usually the one attempting it.)

The game also does not offer a lot of strategy, and I like a lot of strategy options in my games, usually. As a power gamer, I feel like most of the time there is a “correct” place to put a tile, and the game-contrarian in me really rebels from that idea.

Unlike Camel Up, that also relies a lot on luck, this game’s luck can be lopsided and this can be unpleasant. If someone gets all of the cloisters, or they constantly get the tiles they need, the luck element can really pile up.

With all of that said, I am still willing to play it occasionally. The rules are fairly simple and aren’t too bad to teach. Most people seem to enjoy it, especially the first time they play it. In addition, this is an excellent gateway into other current board games. For the people that enjoy this game, there are also plenty of expansions and re-themed versions, some significantly better than others from what I’ve heard.

I definitely think this game is worth playing. If you really enjoy it, grab a copy. If not, it’s a good game to know something about.

Axis and Allies Europe 1940 Second Edition Preview

A&AEurope19402ndEditionBoxAxis and Allies is a strategy-driven, option-rich game. The Axis player(s) devise a strategy for conquest. The Allies must stop it. Both sides utilize 14 types of units, national objectives, and a bit of luck to defeat their opponent(s); anticipating and adapting is crucial. While the goals are fairly constant, each game can unfold in radically different ways.

A&AEurope19402ndEditionInProgress

A&AEurope19402ndEditionCloseUpUnits

A&AEurope19402ndEditionCloseUp

Constructed Epic: After You

Epic Box

Foreword

The goal of this deck is to force your opponent to spend their gold first as often as possible.

First Shot Deck List

After You 1.0

Evil (0)

Good (0)

Sage (34)

Slow (11)
3x Elara, The Lycomancer
3x Juggernaut
3x Sea Titan
2x Time Walker

Fast (12)
3x Helion, the Dominator
3x Memory Spirit
3x Temporal Enforcer
3x Turn

0-Cost (11)
3x Forcemage Apprentice
2x Fumble
3x Hasty Retreat
3x Muse

Wild (26)

Slow (6)
3x Kong
3x Raging T-Rex

Fast (12)
3x Draka’s Enforcer
3x Hurricane
3x Strafing Dragon
3x Surprise Attack

0-Cost (8)
2x Feeding Frenzy
2x Flash Fire
1x Lash
3x Lightning Strike

First Shot Explanation

In Epic, it is frequently advantageous if you can get your opponent to spend their gold before you do in a turn. For instance, say it is your turn and you pass holding your gold. Your opponent then ambushes in Lurking Giant. After that enters play, you then spend your gold to play Kong and break their Lurking Giant. If you would have played Kong first, a Lash, Flash Fire, etc. would have been able to finish off your Kong, and then your opponent would still be able to play Lurking Giant unanswered.

drakas_enforcerAnother example of this is when your opponent immediately spends their gold on their turn to use a “if it is your turn” board wipe like Apocalypse. If you still have your gold, once Apocalypse finishes, you can slam down a Draka’s Enforcer. You draw a card and have a 7/7 airborne champion ready to attack face next turn unopposed. On your next turn, you attack before spending your gold, and if they Surprise Attack in a Thundarus to block, you can play your Turn to permanently gain control of that Thundarus, or possibly just take it for the turn with blitz and attack face with it since they spent their gold.

hasty_retreatSo, since the goal is to get your opponent to play their gold first, I have included a lot of high-impact 0-cost cards and ambush champions. Hasty Retreat and Lightning Strike are solid 0-cost cards for dealing with threats. With a 0-cost card, you can potentially remove a 1-cost card leaving your opponent in a neutral or behind position. They can either play a 1-cost card (depleting their gold) or pass holding on to their gold. If they pass, you can let their turn end and just move into your turn denying them a chance to play their slow champions. If they play a 1-cost card, you have a significant advantage in deciding which card you will play afterwards. Fumble works similarly in that it can completely negate an attack while still recycling. Feeding Frenzy, Lash, and Forcemage Apprentice are generally much more devastating on your turn. Almost all of the 0-cost cards included can also be used to draw 2 if needed. Most of the 1-cost cards in this deck don’t have an or draw 2 option.

helion_the_dominatorHelion the Dominator, Memory Spirit, Temporal Enforcer, Draka’s Enforcer, and Strafing Dragon are all excellent ambush plays. They can all do something worthwhile on your opponent’s turn, in order: stop an attack/use one of your opponent’s other champions to block their own attack, return an event to your hand (particularly a 0-cost event to immediately play), bounce a champion, block a champion, or deal 5 damage and potentially block. Memory Spirit, Temporal Enforcer, Draka’s Enforcer, and Strafing Dragon also all have evasion (airborne or unblockable) for attacking your opponent. Whether you attack or expend/hold your Helion depends on the board state, cards in hand, etc. In addition, Helion is an excellent answer to an opponent’s ambushed in champion on your turn.

juggernaut

I am very interested to really try out this deck, since I’m not sure how strong it will be in practice. If it can consistently draw out your opponent’s gold, I think it could really do work. The cards you would want to play on your turn to a neutral board are generally Juggernaut, Sea Titan, Forcemage Apprentice (enough of a threat that it needs to be eventually answered), and Raging T-Rex.


I am not sure how this deck will do with hand management generally, since it relies a lot on single use 0-cost cards and I don’t have events like Ceasefire and Erase. Juggernaut, Memory Spirit, Raging T-Rex, and Draka’s Enforcer due provide some card draw, but if you use all of your 0-cost cards for their effects, you might get into trouble.

time_walkerAs a final note, Surprise Attack into Time Walker is an excellent way to stop token strategies. It can also disrupt most other non 0-cost blitz champion strategies for at least a turn. Swinging in with a 10/10 on your next turn with a probably empty board is also a huge perk.


Constructed Epic: Bounce Aggro

Epic Box

Foreword

This is the spiritual successor to Bouncing Chip which can be found here. Since only 20 cards are the same between the decks, I decided to just start a fresh deck post.

First Shot Deck List

Bounce Aggro 1.0

Evil (9)

Slow (0)

Fast (6)
3x Bitten
3x Inner Demon

0-Cost (3)
3x Dark Knight

Good (9)

Slow (0)

Fast (6)
3x Ceasefire
3x Urgent Messengers

0-Cost (3)
3x Brave Squire

Sage (33)

Slow (9)
3x Juggernaut
3x Mist Guide Herald
3x Time Walker

Fast (15)
3x Helion, the Dominator
3x Memory Spirit
3x Temporal Enforcer
3x Thought Plucker
3x Turn

0-Cost (9)
3x Forcemage Apprentice
3x Shadow Imp
3x Warrior Golem

Wild (9)

Slow (0)

Fast (6)
3x Flame Strike
3x Mighty Blow

0-Cost (3)
3x Rage

First Shot Explanation

This is an aggro deck. I did say previously that I thought aggro decks wouldn’t really be a successful archetype in Epic, aside from Burn, but I was wrong. This deck can output a lot of damage quickly. A large chunk of that damage comes from the 0-cost cards.

shadow_impEach 0-cost card is either a blitz champion or a 4+ offense buff. Shadow Imp is especially dangerous because it is unblockable, and it can either attack twice in one turn or be held onto to protect it/use it as a free chump block. For blocking, you would ambush it in, pass initiative, declare it as a blocker if it lives, and then play a fast 1-cost Sage card to return it to hand if it lived through your opponent’s post-block initiative. Shadow Imp is also an ideal target for Rage, Brave Squire, and Mighty Blow.

mighty_blow


The Wild is included because I wanted the highest single damage events in the game, Flame Strike and Mighty Blow. Rage was a nice bonus.


brave_squire


The Good is included because I wanted 3 Brave Squires. Ceasefire and Urgent Messengers are excellent for a bit of defense and draw.


dark_knightThe Evil is included because I needed 3 Dark Knights. I decided to take Bitten and Inner Demon because it’s helpful to have more than just bounce for removal. Drain Essence could also work for removal and some health gain. Final Task is a definite possibility because it works well with Juggernaut (unbreakable on your turn), Mist Guide Herald (you still get the tribute ability), Time Walker (fast defensive board bounce), Helion, the Dominator (8 blitz offense and a partial Turn), Memory Spirit (can return that final Flame Strike etc.), Temporal Enforcer (bounce and 6 unblockable offense), Thought Plucker (strong tribute, strong damage effect, and unblockable), and I am already running 3 Brave Squires which could prevent that Final Tasked champion from breaking at the end of the turn. After some more testing, I might exchange some of the Bittens and Inner Demons for Final Tasks.

juggernaut


The Sage cards are just solid aggro cards. Helion, the Dominator and Turn give me solid (temporary) removal + a (temporary) threat. Juggernaut and the unblockable champions are excellent for inflicting damage.


temporal_enforcerBounce is solid for both defense and offense, as was the original intention of the deck. For offense, I can play and attack with a Dark Knight, bounce it, and then play/attack with it again that turn. For defense, there is the obvious bounce a threat, but you can also bounce one of your blocking champions as well. For example, your opponent attacks with a blitzing Steel Golem. You block with your Mist Guide Herald, and then, assuming it lives to your post-block initiative, you ambush in Temporal Enforcer and return Mist Guide Herald to your hand. Since Steel Golem was blocked (even though the blocker is no longer in play), the Steel Golem does no damage that turn. Temporal Enforcer can also use its ally ability to bounce Dark Knights or Warrior Golems for a second attack.

mist_guide_herald

Mist Guide Herald is a strong card for this deck because it can bring any of your other threat champions directly into play. Taking that Juggernaut out of the top 5 cards of your deck and putting into play is crazy. Even just taking a Shadow Imp is solid. Also, since this deck has so much bounce, you can potentially replay your Mist Guide Herald multiple times for significant value.


helion_the_dominator

Helion, the Dominator is excellent to steal an opponent’s ambushed in blocker and attack with it that turn, or to steal an opponent’s blitzing attacker to prevent the attack that turn. In addition, you can always use its loyalty ability on itself to be able to immediately use its expend ability. That 2 damage to 2 targets should not be underestimated.


As you can tell, I am experimenting with the card images in the explanation. Feel free to let me know in the comments below if you think this is helpful or just annoying.

The Duke Review

The Duke Box

Foreword

The Duke is a 2-player chess-like game. It requires about 5 or so playthroughs  before you really start to understand what is going on.

The Duke In Progress

How to Play

Goal

The goal of the game is to capture your opponent’s Duke tile.

Set Up

Each player receives 19 tiles and 1 bag. Every tile is a unit that can be used to capture your opponent’s Duke, which is also a tile/unit.

Both players start the game with their Duke tile and 2 of their Footman tiles. The rest of their pieces go into their respective bags. One player places their Duke tile onto the 6 x 6 gameboard on either of the 2 center squares at their edge of the board. Then, that player places their 2 Footman tiles orthogonally (not diagonally) adjacent to their Duke. Afterwards, the other player does the same on the opposite side of the board.

TheDukeSetUp

A Turn

On a player’s turn, they may do 1 of 2 things: activate a tile or draw/place a new tile.

  • Activate a tile

Each tile depicts the potential activations it can make on its face. The three types of activations, in the base game, are movement, strike, and command. Movement is then broken into move, jump, slide, and jump slide. If a tile ends its movement on top of an opponent’s tile, the opponent’s tile is captured (like chess).

After a tile activates, flip that tile. It now has a different set of activations. All tiles start on its starting side depicted by the shaded in pawn. The flipped side depicts an empty pawn in a black box.

TheDukePikeman

For move, the shaded circle, the piece goes from its current position to the position of the shaded circle. If any piece would be in the path to the shaded circle, this option may not be used.

TheDukeFootman

Jump, the empty circle, is like move except you place your piece directly on the empty circle and bypass any tiles in the path.

TheDukeSeer

For slide, the shaded triangle, you can move the tile any number of squares in that direction. You cannot move through pieces and if you end on an opponent’s tile, stop and capture it as usual.

TheDukeDuke

Jump slide, the empty triangle, is the same as slide, except you jump to the selected starting spot and then may start sliding.

TheDukeAssassin

Strike, the 6-pointed star, means you capture the tile in the square with the strike symbol. The tile that used strike does not move, but it still flips.

TheDukeBowman

Command, depicted by a square with shaded triangles in the top left and bottom right corners, lets you move one of your other tiles. You may move a tile from one command square to another command square. Flip the tile that used command after the activation. Do not flip the tile that was moved by command.

TheDukeGeneral

  •  Draw/place a new tile

If you do not want to activate a tile you have on the board, you may draw a new hidden tile from your bag. Once drawn, place it starting side up orthogonally adjacent to your Duke.

Game End

If, at the end of your turn you are in a position to take your opponent’s Duke next turn, you must say “guard.” You may not put yourself into guard (leaving your own Duke vulnerable to be taken on your opponent’s next turn).

You immediately win the game by capturing your opponent’s Duke. If you can neither make a move nor draw/place a tile, you lose.

Conclusion

As I mentioned in the forward, the first few games of The Duke weren’t great. While I understood the rules, the strategy was not clicking at all. Most of the games were quick and seemed kind of stupid and unbalanced. But, the more I played, the more I started to see and understand certain aspects of the game. Now, I actually enjoy it quite a bit.

I would say I’m decent at chess, but I never memorized the openings. So, I know generally of concepts such as space control, material value/advantage, revealed check, etc. These same concepts do apply in The Duke as well. If you enjoy chess for the actual playing of chess and not the memorization (statement inspired by Bobby Fischer), there is a good chance you will enjoy this game.

One of the major differences between this and chess is the randomness. When you draw a tile, there is a wide range of tiles you might get. Due to this, there is a lot less ability to predict future turns. In addition, you need to be able to adapt your strategy based on what you get and what your opponent gets. There are also definitely times where I have drawn tiles that have not helped me at all; that is a thing in this game. Overall though, I have enjoyed the randomness (after I figured out different aspects of the game that is).

The most important tip I can give you is this: do not put your Duke in a position where it is trapped by your own pieces. For instance, don’t move it on the bottom row directly behind one of your tiles in the same column. In this situation, your Duke is pinned until your other tile moves or is captured. It isn’t very difficult to force the capture of a pinned Duke.

I would recommend trying The Duke, if you like chess or other similar 2 player games. My main caveat is that you power through at least 5 games to give this a chance to get its hooks in. I definitely do not see this taking the place of chess because chess is so entrenched. The randomness will potentially hold it back as well. Nonetheless, this is a game I would be happy to play with other people who have played it. I’ll teach it to someone, but only if they already show some interest in this type of game.

Constructed Epic: Dinos and Friends

Epic Box

Foreword

Great Horned Lizard made me want to make a Dinosaur deck. So I did.

First Shot Deck List

Dinos And Friends

Evil (2)

Slow ()

Fast (2)
2x Final Task

0-Cost ()

Good (9)

Slow (1)
1x Thundarus

Fast (6)
3x Ceasefire
3x Resurrection

0-Cost (2)
2x Brave Squire

Sage (0)

Wild (49)

Slow (20)
3x Brachiosaurus
2x Draka, Dragon Tyrant
3x Fire Spirit
3x Jungle Queen
3x Kong
3x Raging T-Rex
3x Triceratops

Fast (13)
1x Chomp!
3x Draka’s Enforcer
1x Draka’s Fire
2x Great Horned Lizard
2x Hurricane
1x Smash and Burn
3x Surprise Attack

0-Cost (16)
3x Ankylosaurus
3x Cave Troll
3x Feeding Frenzy
3x Fire Shaman
1x Lash
3x Wurm Hatchling

First Shot Explanation

I attack with Triceratops. Opponent ambushes in a Lurking Giant. I play Great Horned Lizard, breakthrough the Lurking Giant, and swing for 10 breakthrough with the Great Horned Lizard. That scenario was largely the impetus behind this deck. I really liked that interaction, in theory.

The rest of the deck just makes use of big, high-value Wild champions. The only other particularly interesting interaction in this deck is Draka, Dragon Tyrant Attack, followed immediately by Feeding Frenzy. This is one situation where you would actually use that window to play cards immediately after your attack and before your opponent gets a chance. (Fire Shaman 1-cost Wild card followed by Feeding Frenzy also works.) There is also the Final Task into Brave Squire trick.

(Use Final Task to return a champion from a discard pile to play. Then, you cast Brave Squire on that champion granting it unbreakable this turn. During the end step, you first resolve any “at the end of the turn” triggers. At this point, Final Task tries to break your returned champion, but it is unbreakable so it can’t. The “this turn” trigger from Brave Squire falls off after this point. Since Final Task only tries to break that champion once, that champion is now permanently in play. This also works when you use Final Task on your turn on an “unbreakable on your turn” champion, Juggernaut for instance.)

When I played this deck, it was fairly lackluster. I never had the Great Horned Lizard interaction I wanted, and I used my Feeding Frenzies just to draw 2. It is still a bit early to call it for this deck, but it didn’t show much promise. I do have a couple directions I want to experiment with going forward.

A Feeding Frenzy based direct damage chip deck featuring Blue Dragons, Forcemage Apprentices, and Helion the Dominators could be interesting. I could also make use of Lightning Storms, Rain of Fires, and potentially Fire Shamans/Fire Spirits. Memory Spirits could also be excellent to further exploit Feeding Frenzy. This would be a very different deck. (I would need to keep reminding myself that Feeding Frenzy can only break on my turn.)

A more similar deck could try and exploit the 10+ toughness champions that draw a card to overwhelm my opponent. For this deck, I could make use of Kong, Raging T-Rex, Triceratops, Sea Hydra, Lurking Giant, and possibly Jungle Queen/Draka’s Enforcer. Hurricane would be the major star of the deck, but I think Smash and Burn could work excellently in this deck as well. I would mainly just draw 2 and use the 6 champion damage to finish off pesky utility champions. This deck would probably also bring a lot of bounce like Erases to deal with other high toughness champions. Sea Titan, Hasty Retreat, and Vanishing could all also show up. The 0-costs would only be particularly viable if I had enough card draw. I would probably not bring 3 Feeding Frenzies to this deck, but definitely at least 1 Lash.

So, those are the 2 directions I might take this deck. Let me know in the comments below if anyone has a preference in which route I take. (I’ll probably do both eventually, but I am also working on other decks and articles so the second one won’t show up for awhile.)